In this post, we will walk through the steps for using awsvpc network mode for Windows containers running in Amazon ECS.
Background:
Previously, Windows tasks on Amazon ECS supported only default network mode, which relied on Docker’s default networking to set up the network stack for the containers. In the default network mode, all the containers are connected to each other using a Windows nat network and assigned an IP address from the nat network’s internal prefix IP range.
When using the default network mode, task containers communicate with endpoints outside the instance using nat network and therefore, share the elastic network interface (ENI) attached to the instance. This means that all the containers running on an EC2 instance share the network policies of the instance ENI. Hence, the security group and ACL policies of the instance ENI needs to be a superset of requirements of all the tasks. For our customers, it means that they have limited control over the security policies of their tasks. Containers of tasks using default network mode are addressable in the VPC using their instance ENI’s IP address and the host port to which the container port was mapped. This leads to port conflicts that need to be managed by the customer, leading to additional configuration in the application.
With the awsvpc network mode, the tasks run in their own network namespace and are associated with their own elastic network interface. Amazon ECS controls the complete lifecycle of the task’s ENI from provisioning, attachment to cleanup. The major benefits of using awsvpc network mode are:
- Fine grain access control over the applications by associating custom security group with each task.
- Simplified application architecture with each task being addressed by its own IP address and the container port without the need of any host port mapping. The containers of the task communicate with each other over the localhost interface.
- Better network performance because the tasks do not contend for bandwidth on the shared network interface.
- Ability to use EC2 network monitoring tools as well as Elastic Load Balancing at the task level.
Supported functionality with awsvpc network mode for Windows tasks:
Amazon ECS tasks that run in awsvpc network mode support all the functionality supported by the tasks that run in default network mode. Functionality supported with awsvpc network mode which might be of interest are:
- Ability to use Application Load Balancers and Network Load Balancers by attaching the tasks as IP targets.
- Ability to use other EC2 network monitoring features such as VPC flow logs at the task level.
- Automatic configuration of IAM roles for tasks without running any bootstrap script.
- Ability to use gMSAs remains the same as before with this feature.
- Ability to use Amazon FSx for Windows File Server volumes remains the same as before with this feature.
Getting started:
Now, let’s get started with the running a basic Windows task using awsvpc network mode.
You can use your existing ECS cluster for this walkthrough or create a new one by using the create cluster wizard. If you use your existing cluster, then ensure that the EC2 instances running in the cluster are using the latest Windows AMIs.
Registering a task definition
The change in the task definition for using awsvpc network mode is to specify awsvpc in the networkMode parameter of the task definition.
The following is a sample JSON task definition.
{
    "family": "windows-simple-iis",
    "containerDefinitions": [
    {
        "name": "windows_sample_app",
        "image": "mcr.microsoft.com/windows/servercore/iis",
        "cpu": 1024,
        "entryPoint":["powershell", "-Command"],
        "command":["New-Item -Path C:\\inetpub\\wwwroot\\index.html -Type file -Value '<html> <head> <title>Amazon ECS Sample App</title> <style>body {margin-top: 40px; background-color: #333;} </style> </head><body> <div style=color:white;text-align:center> <h1>Amazon ECS Sample App</h1> <h2>Congratulations!</h2> <p>Your application is now running on a container in Amazon ECS.</p>'; C:\\ServiceMonitor.exe w3svc"],
        "portMappings": [
        {
            "protocol": "tcp",
            "containerPort": 80
        }
        ],
        "memory": 1024,
        "essential": true
    }
    ],
    "networkMode": "awsvpc",
    "memory": "1024",
    "cpu": "1024"
}
JSON
If you want to use your tasks with an ECS service, then you specify the container port as well. We have specified container port as 80 in the above task definition.
In the ECS section of the AWS Management Console, specify awsvpc as the Network Mode when you register your your task definition.
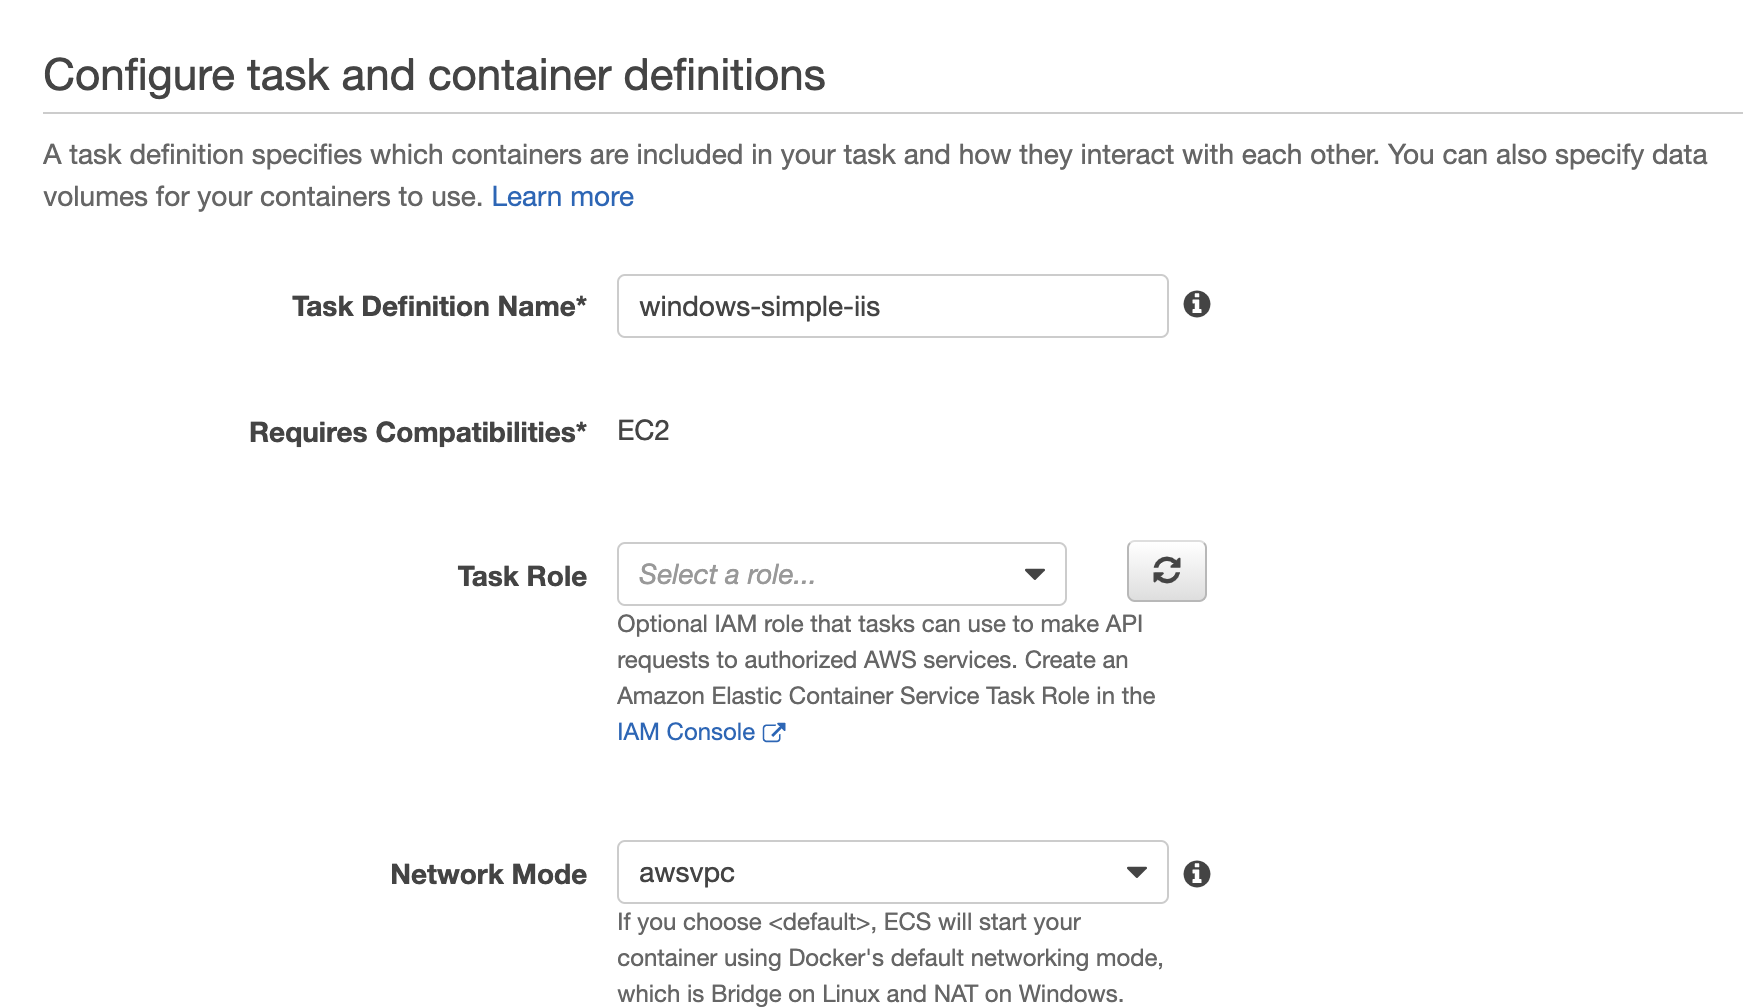
This task definition uses awsvpc network mode and consists of a single Microsoft IIS server container running on port 80.
To create a task definition by using AWS CLI
aws ecs register-task-definition --cli-input-json file://path_to_json_fileBash
Running the task:
In order to run the task, navigate to the cluster in which you want to run this task. Select the Run new task option. In the following screen, select the appropriate configuration. This includes selecting the task definition that we created earlier and specifying the set of subnets in which the task will run. Select or create an appropriate security group for the task. Note that you need to have at least one EC2 instance with the latest Windows AMIs registered in the subnets you specified in the run task configuration.
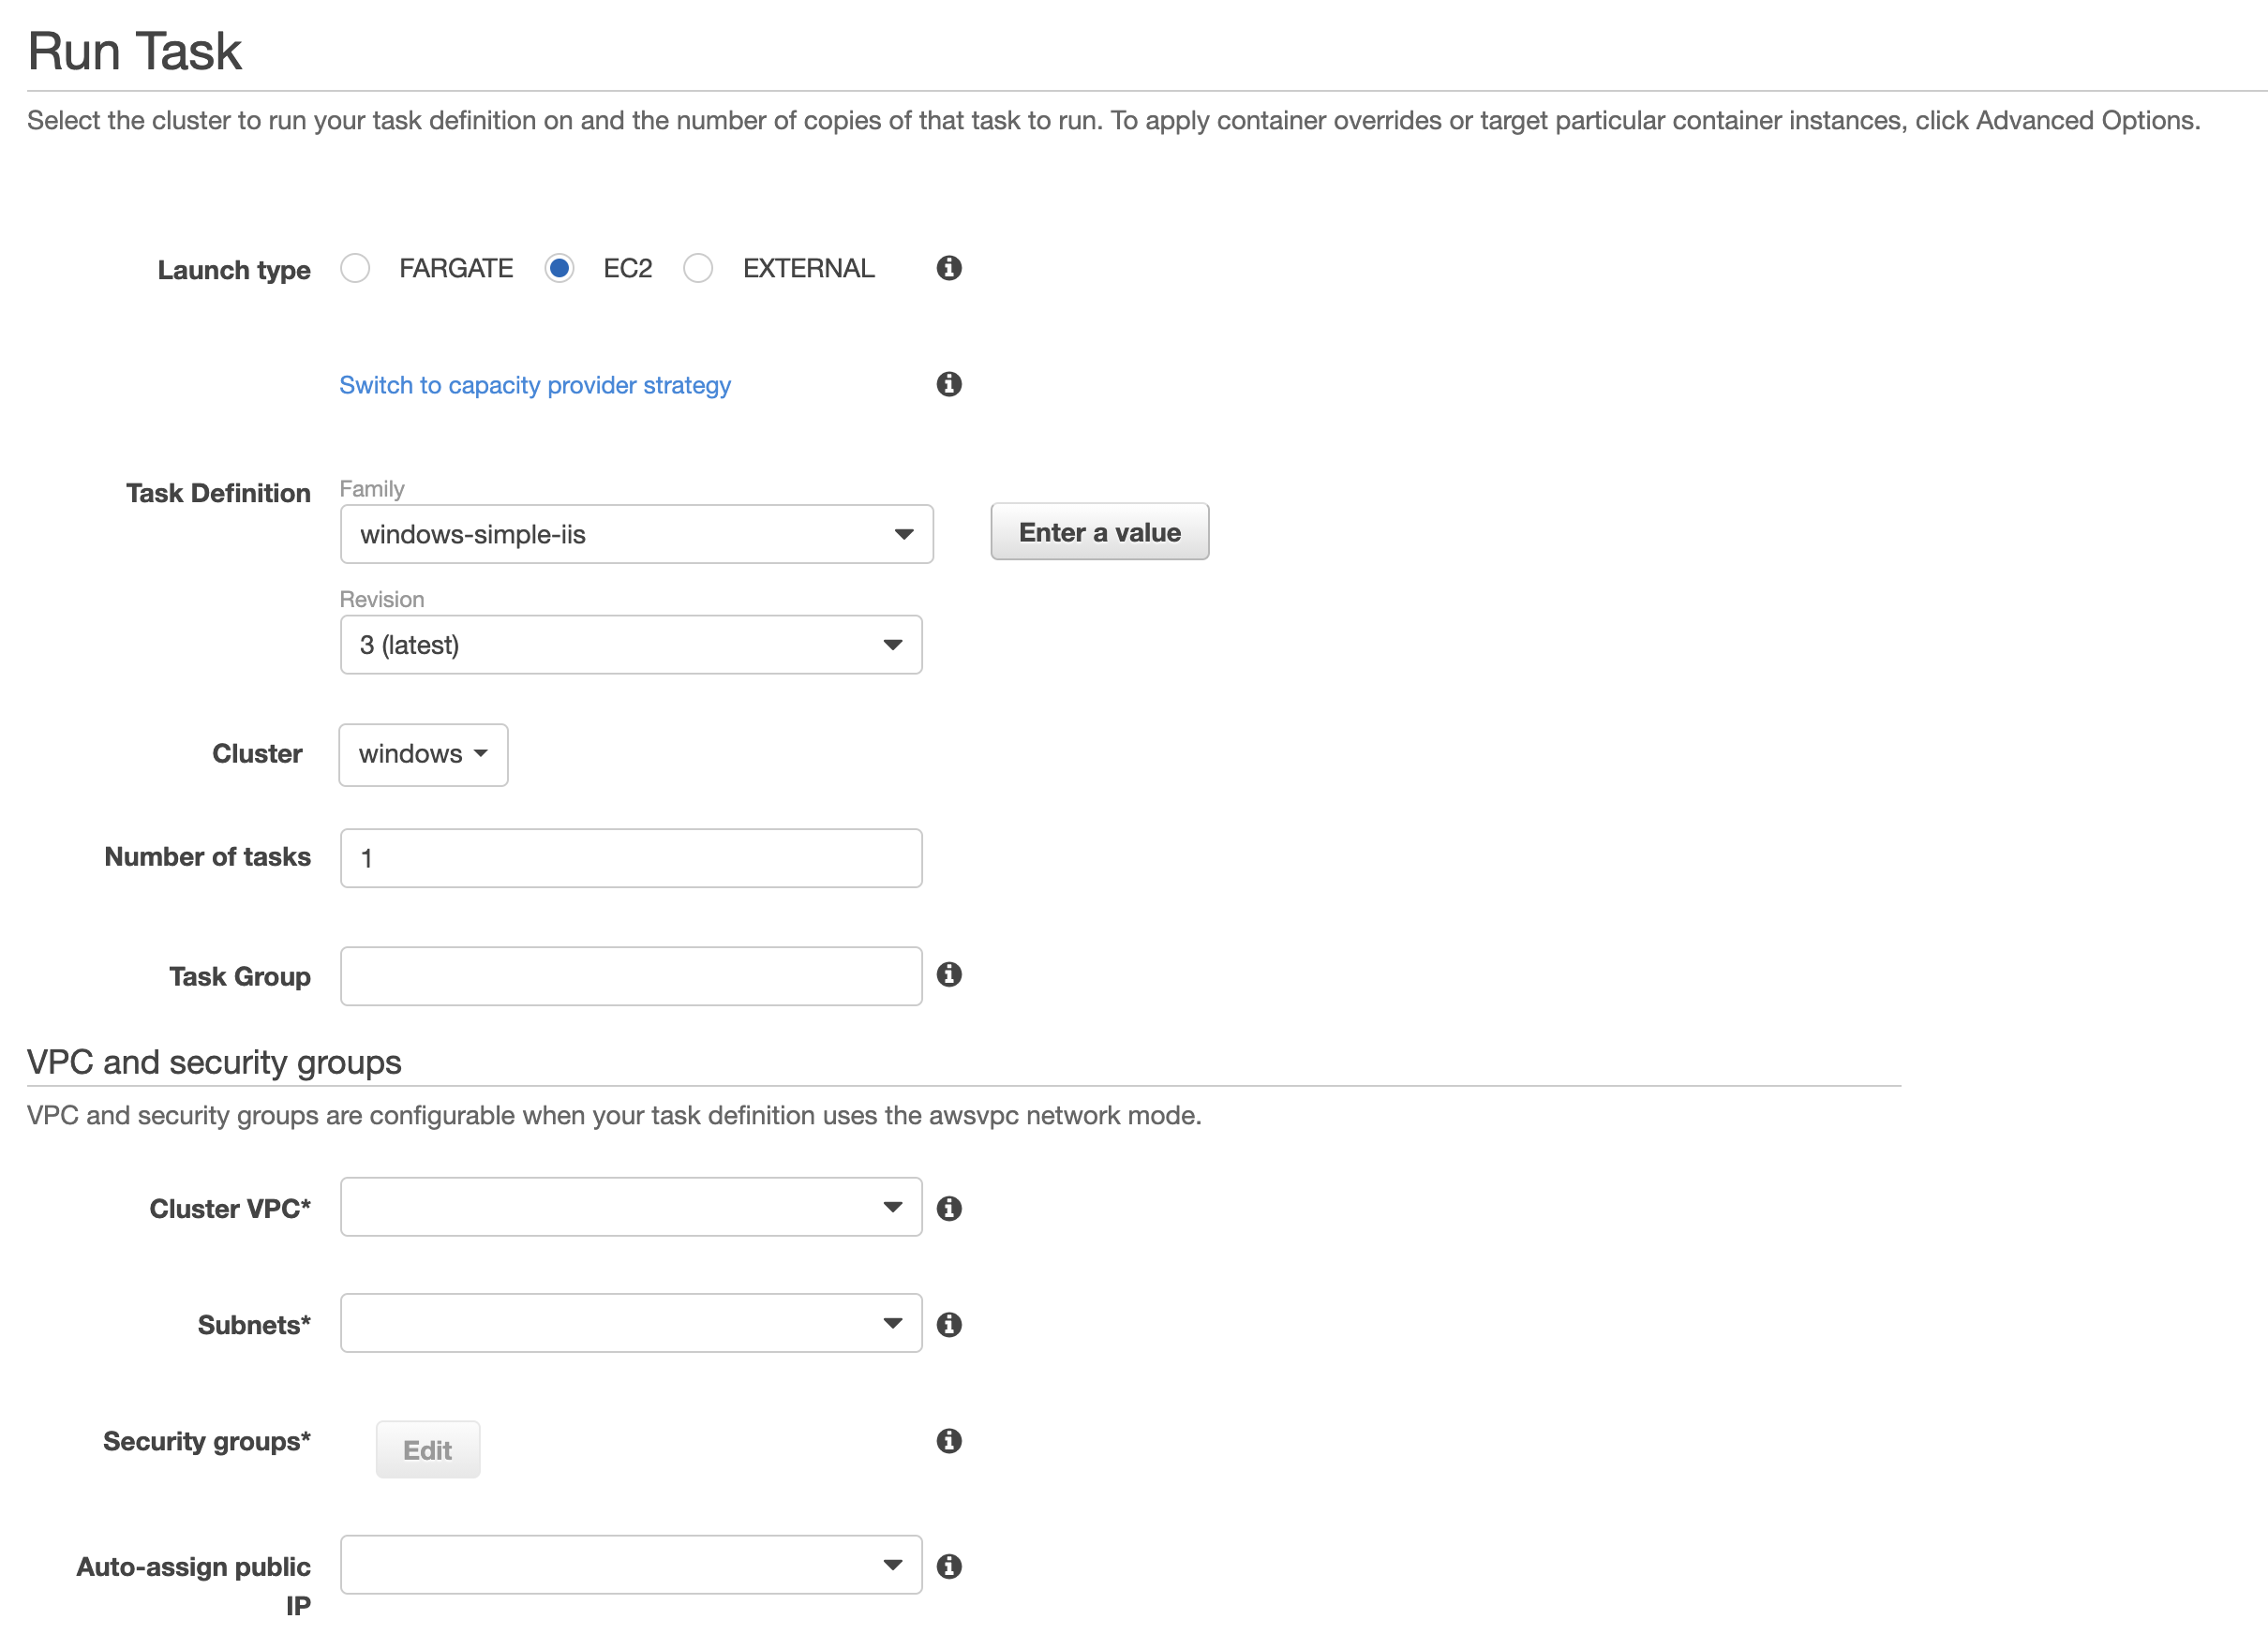
Now select the Run Task option to launch the tasks.
Your tasks should soon be up and running. You can verify the elastic network interface associated with the task. The details should be similar to the following.

The Windows IIS server is reachable in your VPC using the task’s IP address i.e. 10.0.0.11. The traffic to/from the task would be controlled by the security group specified in the run task configuration. It is possible to have different security groups for the EC2 instance and the task.
To run the task by using AWS CLI
aws ecs run-task --cluster windows --task-definition windows-simple-iis:1 --count 1Bash
To inspect the task by using AWS CLI
aws ecs describe-tasks --cluster windows --task task_ID